2. Generate Your API Credentials
Prerequisites
To generate API credentials, you must enable Two-Factor Authentication (2FA), a security process to protect your credentials and resources more robustly. With 2FA, you need to provide two authentication factors to verify yourself: password and security token.
To add this additional layer of security to the authentication process, you need to install an application on your cell phone that generates new security tokens every 30 seconds. Download Authy or the appropriate version of Google Authenticator for your phone.
You can enable 2FA only on the web Bitso application. To initiate the process:
- Log in to your account.
- Hover over your name and select Profile from the drop-down list.
- Select Security on the left-hand bar.
- Select Account security on the sub-menu that appears.
- In the 2FA Token section, click the Enable button.
- Follow the self-explanatory procedure to add this security layer. For a complete description of the process, visit the Help Center.
Generating API Credentials
After your testing account and 2FA are set up, create your API credentials as follows:
- Go to Bitso API setup. If you're not logged in, then the login screen appears first. After logging in,
a. Hover over your name and select Profile from the drop-down list.
b. Select API on the left-hand bar. - If you have not enabled 2FA in your account, then a modal appears asking you to do it before generating the API credentials. Click the button Enable 2FA.
- When you finish enabling 2FA, you are at the API Setup page. Click the button Add new API key.
A modal showing Important security information might appear. - If the modal appears, ensure you read the warning, check the acceptance box, and click Continue.
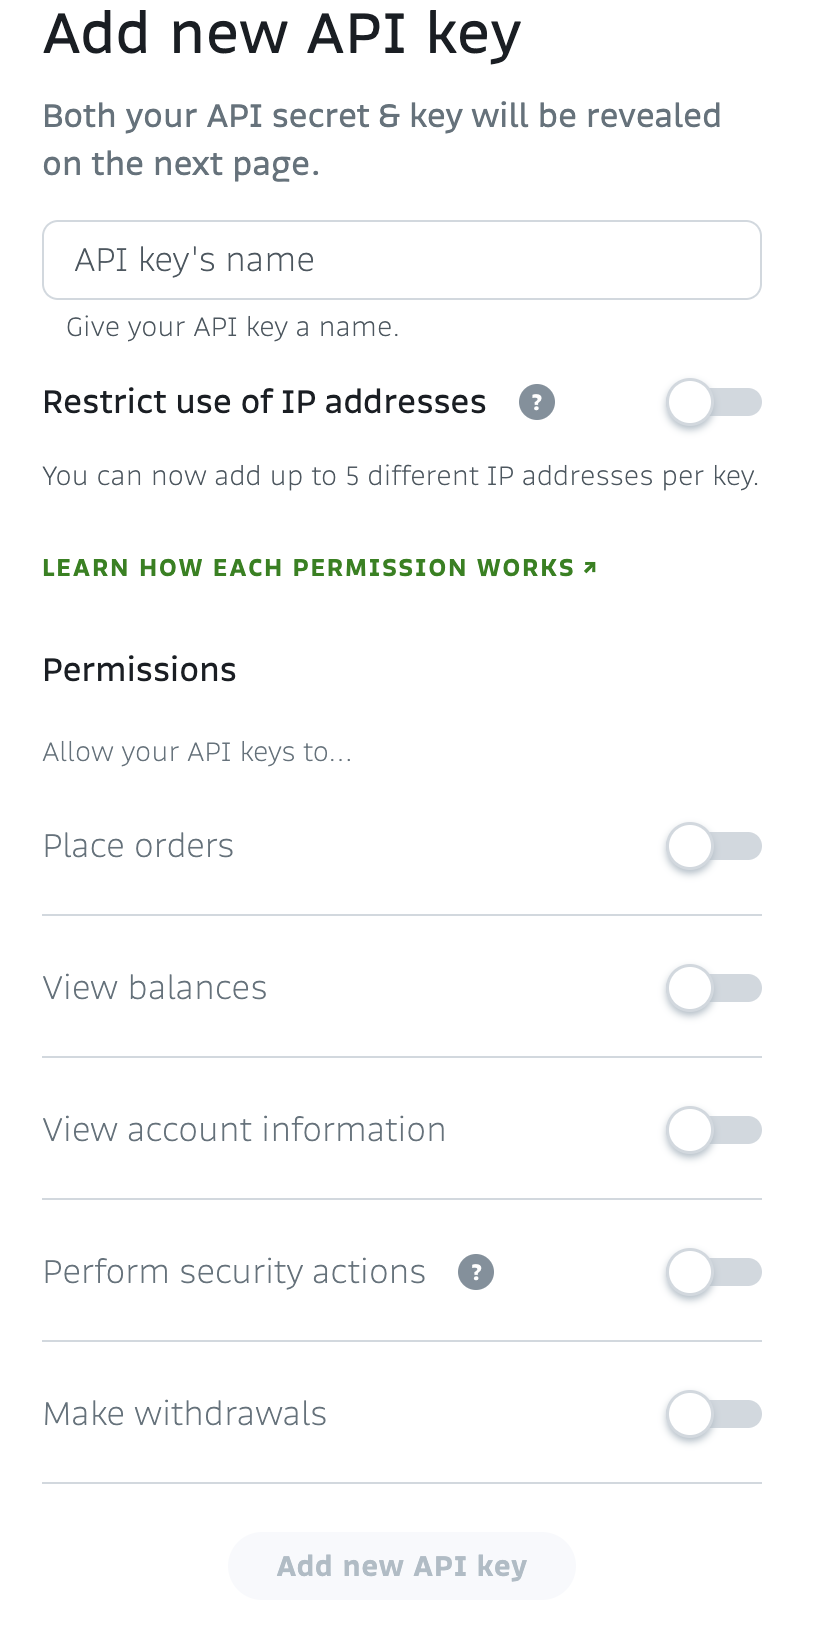
The Add new API key page appears; see Figure 1. - Complete the following three-step process to configure the new key:
- Give your API key a name that helps you to easily identify it.
- If you want the API to only validate requests from a list of approved IP addresses (allowlist), enable Restrict use of API addresses. You can have from none up to five addresses in this list.
- Lastly, in Permissions, ensure you toggle all the functionalities you need for your API credentials and restrict receiving addresses if you want. For further details on permissions, see the section, Notes on Permissions.
- Click the button Add new API key to save your credentials. Be ready to provide the 2FA token before getting the credentials.
- Ensure you store your API key and secret in a safe place because you need them to sign your API requests. The application displays the secret only once, and no way exists to show the secret again. If you don’t save them, then the fix is creating a new set of credentials. Also, always keep your credentials private; otherwise, you're giving access to your account and funds.
- Check the understanding box and click Go back to API setup to view your newly created key. You can edit your API key configuration if you change your mind later.
How many API keys can I have?
You can configure up to six keys in your Bitso account.
Notes on Permissions
API Key Permissions are Bitso's implementation of AuthZ (authorization). They determine what your API credentials can do:
- Place orders: Enables placing limit and market orders to buy or sell assets. It includes retrieving a list of your trades and open orders.
- View balances: Enables getting the global balance of your account (wallet) and a breakdown of the balance per each supported currency.
- View account information: Enables retrieving your account details, such as personal data, user ID, name, email address, account status, uploaded documents, and transaction limits.
- Perform security actions: Enables modifying your account settings. It includes deactivating your account or blocking withdrawals.
- Make withdrawals: Enables transferring fiat or crypto funds from your Bitso account. When you activate this permission, you can leverage your withdrawal security by adding up to five destination addresses per cryptocurrency supported by Bitso, to which your API key can complete withdrawals. Only the addresses listed for a given asset can receive withdrawals from your account. An empty list means any address can receive funds.
If you plan on integrating your Bitso account with the Vector trading platform, Bitso recommends activating the following permissions:
- Place orders
- View balances
- View account information
You can find further details about the Vector platform on our Help Center.
Updated 10 months ago